Samples
|
FORM Authentication (Tomcat)
- The application structure
- Configure the file "tomcat-users.xml"
- Add and configure the file "web.xml"
- Add and configure the file "index.jsp"
- Add and configure the file "login.jsp"
- Add and configure the file "error.jsp"
- Test the FORM authentication
-
The application structure
|+ ${TOMCAT_HOME} |+ webapps |+ auth |+ WEB-INF |+ web.xml |+ jsp |+ index.jsp |+ login.jsp |+ error.jsp -
Configure the file "tomcat-users.xml"
You need to activate the users/roles that will be authorized to authenticate to the application.
File location: ${TOMCAT_HOME}/conf/tomcat-users.xml
Example:
<role rolename="tomcat"/>

<user username="tomcat" password="tomcat" roles="tomcat"/>
-
Add and configure the file "web.xml"
You need to configure your application so it will handle FORM Authentication.
File location: ${TOMCAT_HOME}/webapps/auth/WEB-INF/web.xml
<?xml version="1.0" encoding="ISO-8859-1"?> <web-app xmlns="http://xmlns.jcp.org/xml/ns/javaee" xmlns:xsi="http://www.w3.org/2001/XMLSchema-instance" xsi:schemaLocation="http://xmlns.jcp.org/xml/ns/javaee http://xmlns.jcp.org/xml/ns/javaee/web-app_4_0.xsd" version="4.0" metadata-complete="true"> <welcome-file-list> <welcome-file>index.jsp</welcome-file> </welcome-file-list> <security-constraint> <web-resource-collection> <web-resource-name>Web Resource - Allow GET method</web-resource-name> <url-pattern>/jsp/*</url-pattern> <http-method>GET</http-method> </web-resource-collection> <auth-constraint> <role-name>tomcat</role-name> </auth-constraint> </security-constraint> <security-role> <role-name>tomcat</role-name> </security-role> <login-config> <auth-method>FORM</auth-method> <form-login-config> <form-login-page>/jsp/login.jsp</form-login-page> <form-error-page>/jsp/error.jsp</form-error-page> </form-login-config> </login-config> </web-app> -
Add and configure the file "index.jsp"
Here's a simple page that will show the connected user.
File location: ${TOMCAT_HOME}/webapps/auth/jsp/index.jsp
<html> <head> <title>Index Page</title> </head> <body> User: <b><%= request.getRemoteUser() %> </body> </html> -
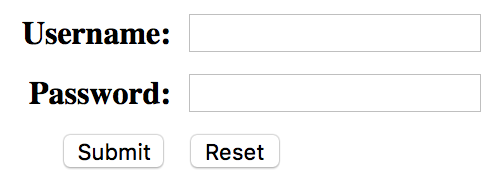
Add and configure the file "login.jsp"
Here's a simple page that will allow the user to authenticate to the application.
File location: ${TOMCAT_HOME}/webapps/auth/jsp/login.jsp
<html> <head> <title>Login Page</title> </head> <body> <form method="POST" action='<%= response.encodeURL("j_security_check") %>'> <table cellspacing="5"> <tr> <th align="right">Username:</th> <td align="left"><input type="text" name="j_username"></td> </tr> <tr> <th align="right">Password:</th> <td align="left"><input type="password" name="j_password"></td> </tr> <tr> <td align="right"><input type="submit"></td> <td align="left"><input type="reset"></td> </tr> </table> </form> </body> </html> -
Add and configure the file "error.jsp"
Here's a simple page that will show an error message if the authentication failed.
File location: ${TOMCAT_HOME}/webapps/auth/jsp/error.jsp
<html> <head> <title>Error Page</title> </head> <body> Invalid username/password! </body> </html> -
Test the FORM authentication
URL: http://localhost:8080/auth/jsp/
Here are the requests headers as it will be send by the browser, and the responses headers as it will be send back by Tomcat:
-
First, the browser will send these headers as part of the request:
GET /auth/jsp/ HTTP/1.1
Host: localhost:8080
...
-
Second, Tomcat will send back these headers as part of the response (200 OK):
HTTP/1.1 200
Set-Cookie: JSESSIONID=0092B8A71FDB1DAAA5C737582A201459;path=/abc/;HttpOnly
...
-
When you fill your username/password and you submit the form, the browser will send these headers as part of the request:
POST /auth/jsp/j_security_check;jsessionid=0092B8A71FDB1DAAA5C737582A201459 HTTP/1.1
Host: localhost:8080
Cookie: JSESSIONID=0092B8A71FDB1DAAA5C737582A201459
j_username=tomcat&j_password=tomcat
...
-
Then Tomcat will send back these headers as part of the response (200 OK + URL redirection):
HTTP/1.1 200
Location: http://localhost:8080/auth/jsp/
...
-
Then the browser will send these headers as part of the request:
GET /auth/jsp/ HTTP/1.1
Host: localhost:8080
Cookie: JSESSIONID=0092B8A71FDB1DAAA5C737582A201459
...
-
And then Tomcat will send back these headers as part of the response (200 OK):
HTTP/1.1 200
Set-Cookie: JSESSIONID=89F7D6BB78A0059B4570B1DF49B496EB;path=/abc/;HttpOnly
...
-
First, the browser will send these headers as part of the request: